Getting started
dns-monitor is a single Go binary plus a config.yaml. It resolves the DNS records you’ve declared on a fixed interval, stores the history in SQLite, and serves a dashboard on :8080.
Prerequisites
Section titled “Prerequisites”- Go 1.25+ (for building from source), or
- Docker (to run the published image)
Run from source
Section titled “Run from source”git clone https://github.com/zachbroad/dns-monitorcd dns-monitorgo run ./cmd/dns-monitorOpen http://localhost:8080.
Run with Docker
Section titled “Run with Docker”docker run --rm -p 8080:8080 \ -v dns-monitor-data:/data \ ghcr.io/zachbroad/dns-monitor:latestThe published image bundles the default config.yaml. To use your own, mount it over /app/config.yaml and point db_path at the /data volume — see the Docker guide.
Your first target
Section titled “Your first target”Edit config.yaml:
interval: 30slisten: ":8080"db_path: "dns-monitor.db"targets: - name: example-a host: example.com type: A expect: - 93.184.216.34Restart the binary. Within interval, the dashboard will show one row per target with the latest resolved answer and its latency. If the resolved set drifts from expect, the row is flagged.
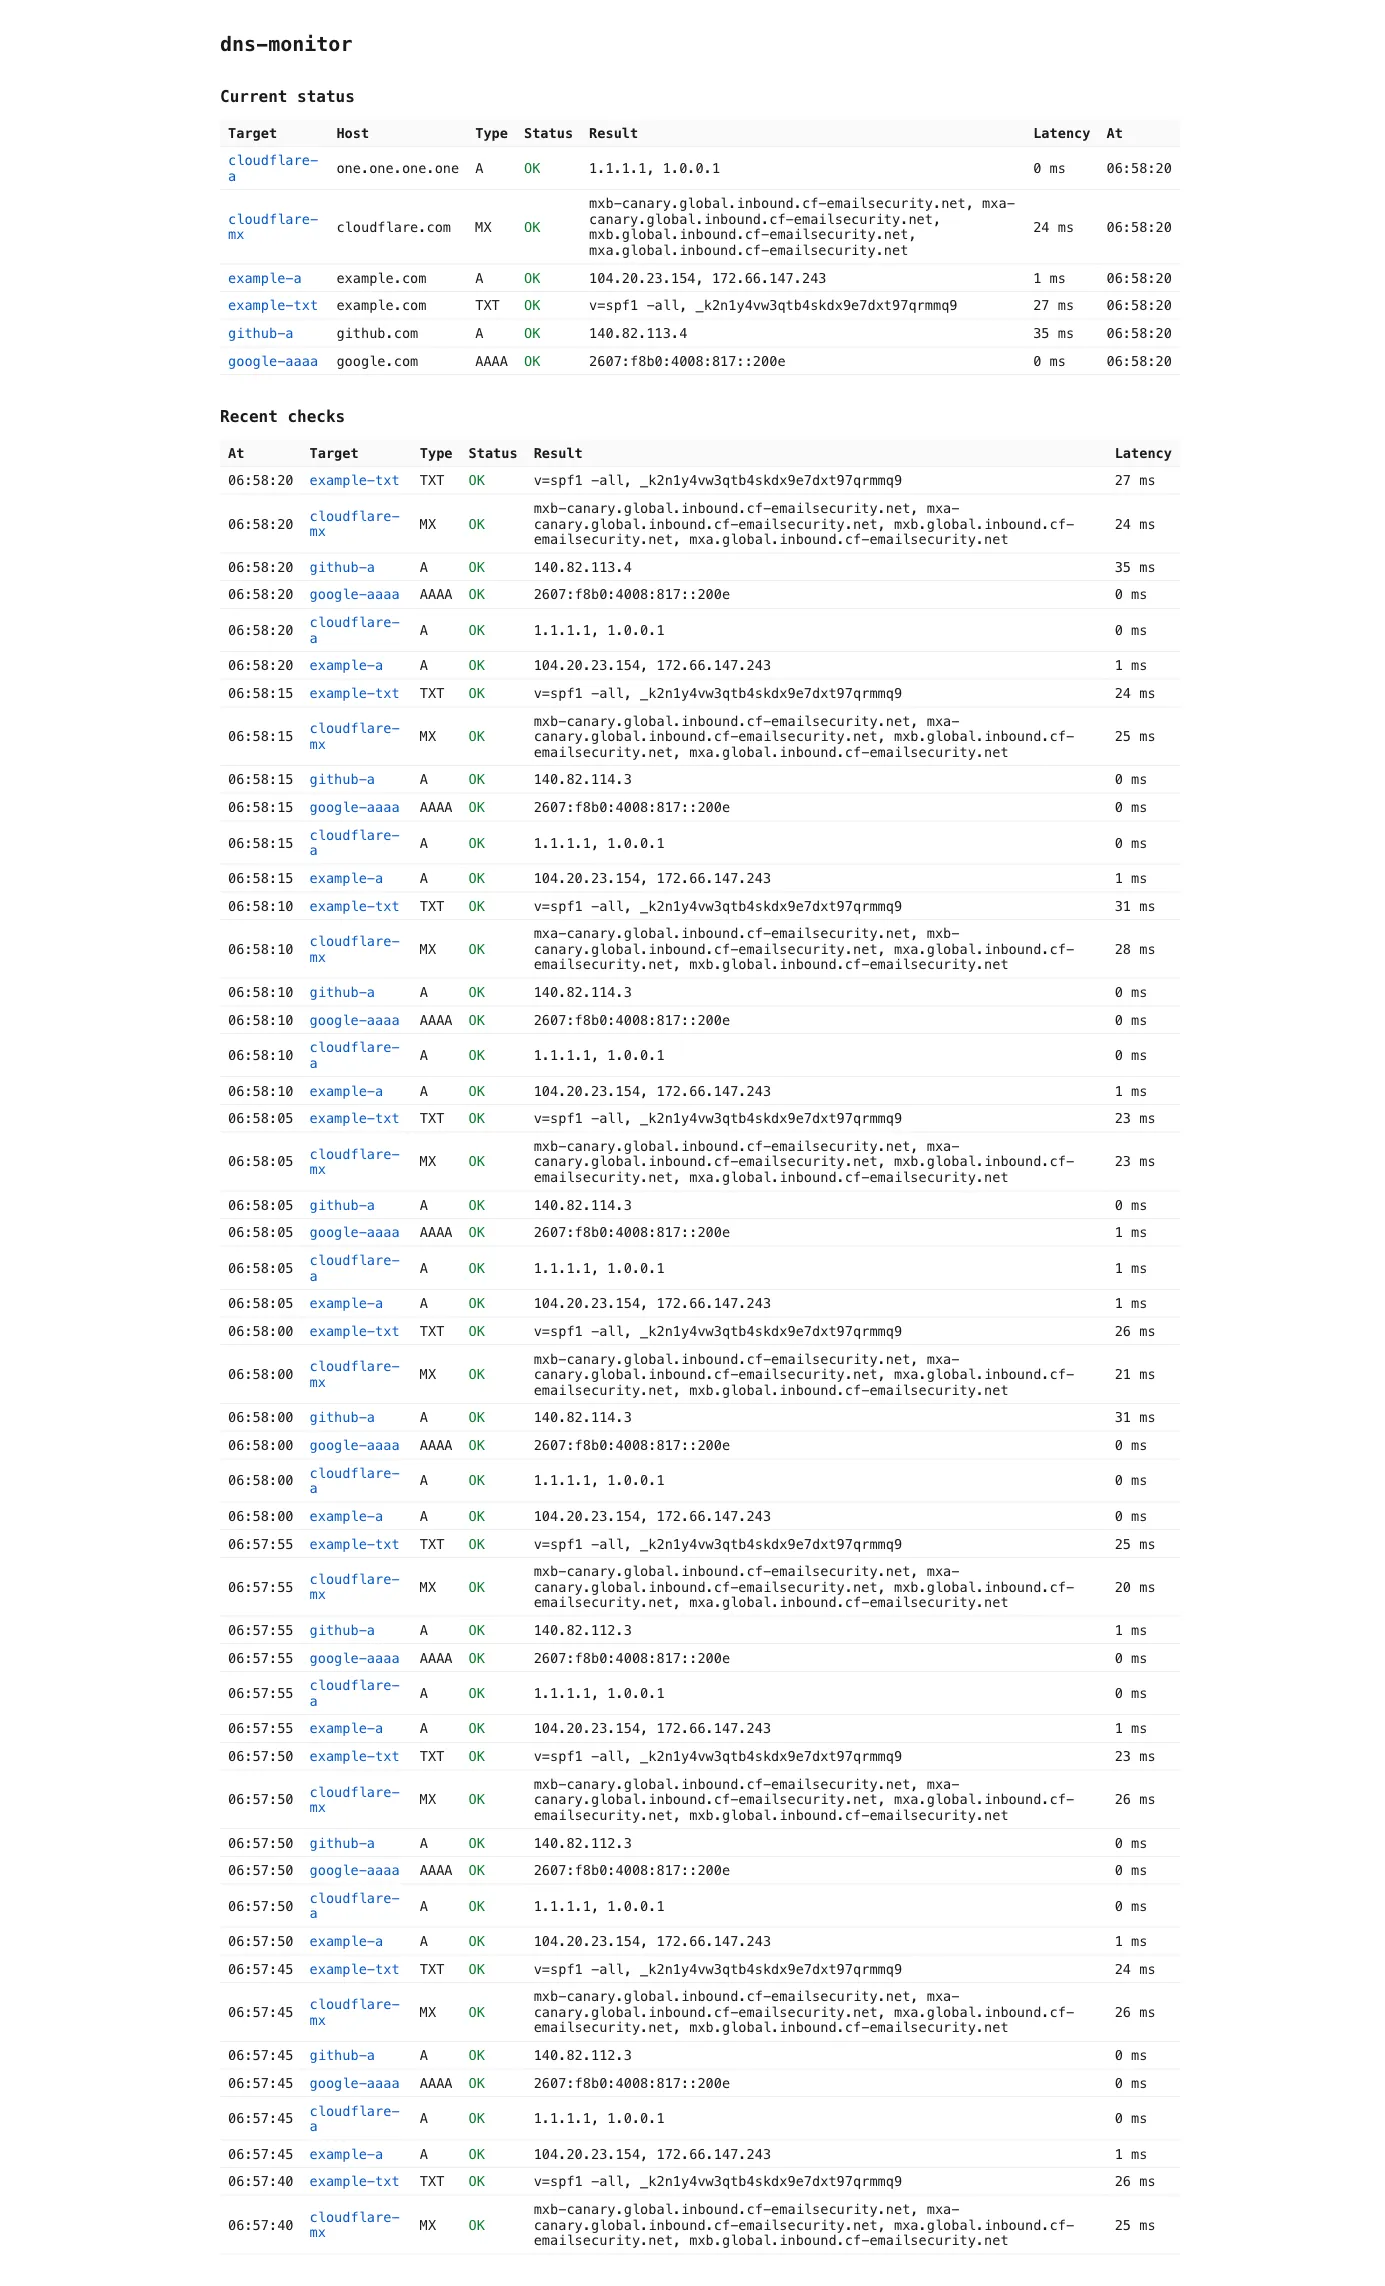
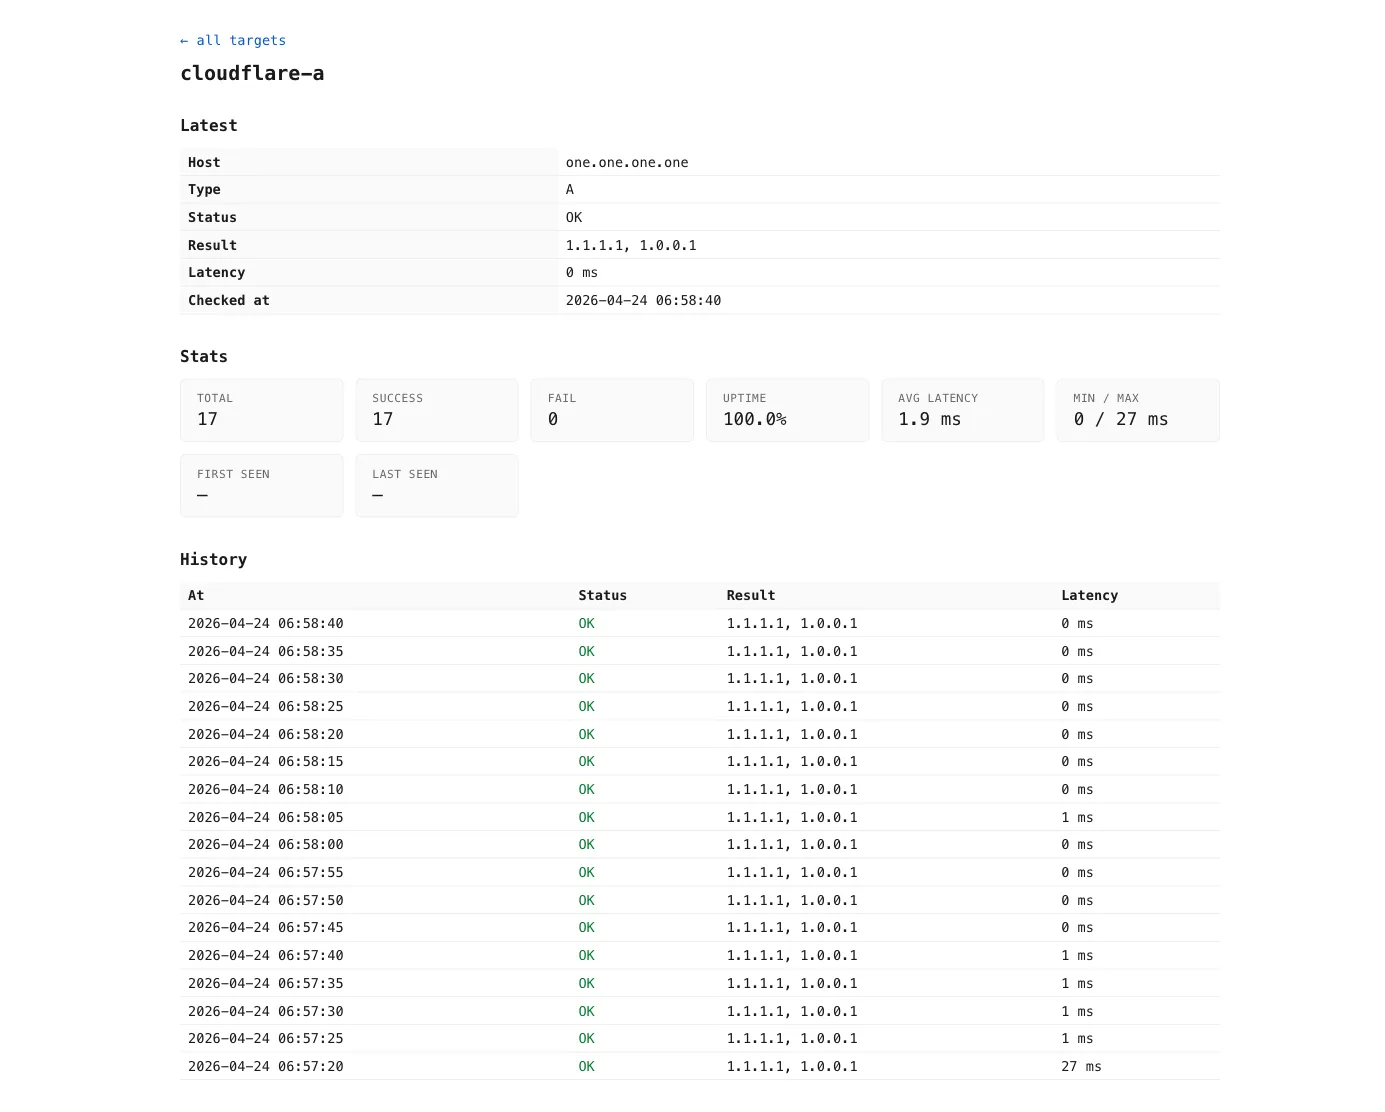
Clicking a target name opens a detail page with its latest answer, uptime / latency stats, and history:
Next steps
Section titled “Next steps”- Configuration reference — every field in
config.yaml. - MCP server — expose the history to Claude and other MCP clients.
- Docker & deployment — running the container with persistence.